Video Tutorials To Verify Domains for the Top 3 Hosting Companies:
Domains Not Listed Above:
Verifying a Domain With OHWO is a 3 Step Process
Step 1. Copy Information From Your OHWO Dashboard
Step 2. Paste The Information Into Your Domain Hosts DNS Records
Step 3. Click Verify DNS Records Inside Your OHWO Dashboard
We’ll take you through all 3 steps and will include links to more host tutorials.
STEP 1: COPY INFORMATION FROM YOUR OHWO DASHBOARD
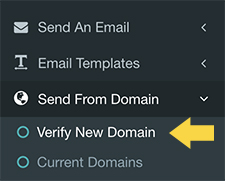
Click “Verify New Domain” within your “Send From Domain” Left Side Menu
Enter Your Domain Link In “Domain Name” Field
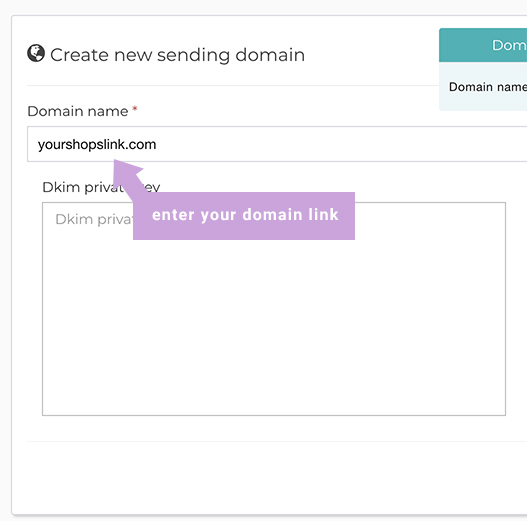
Leave all other fields blank and click Save Changes

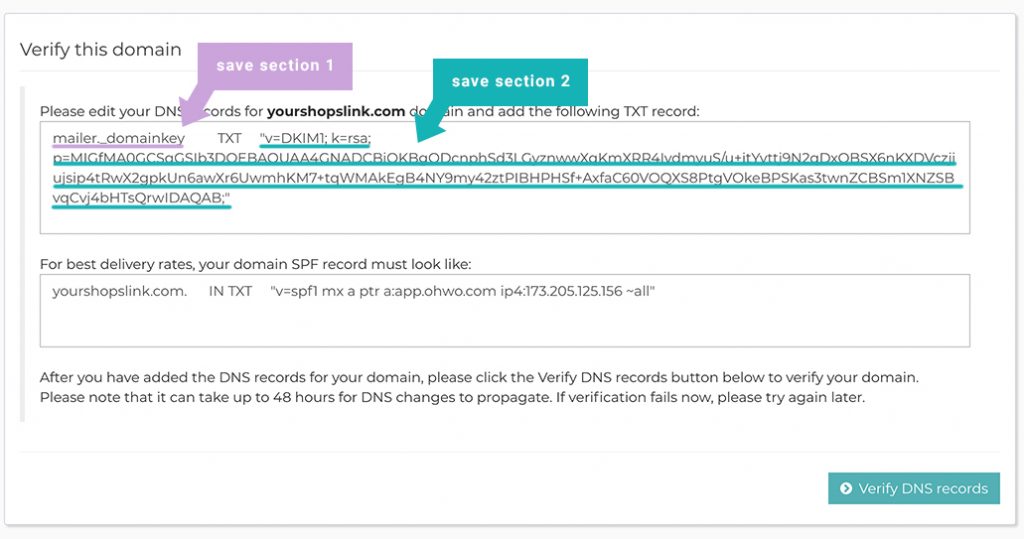
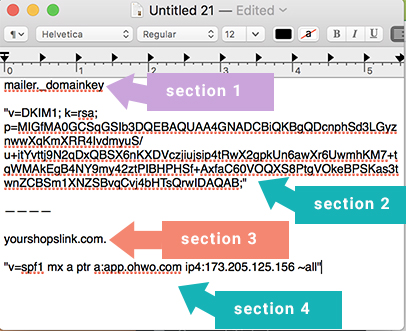
Save Sections 1 & 2 In a Word Doc
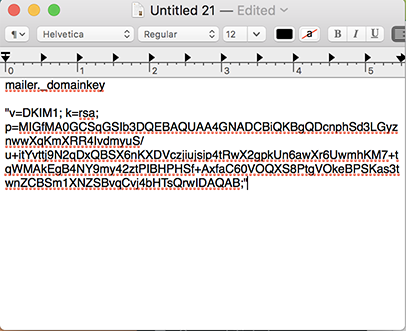
Save to Text Doc
Save Sections 3 & 4 In The Same Word Doc
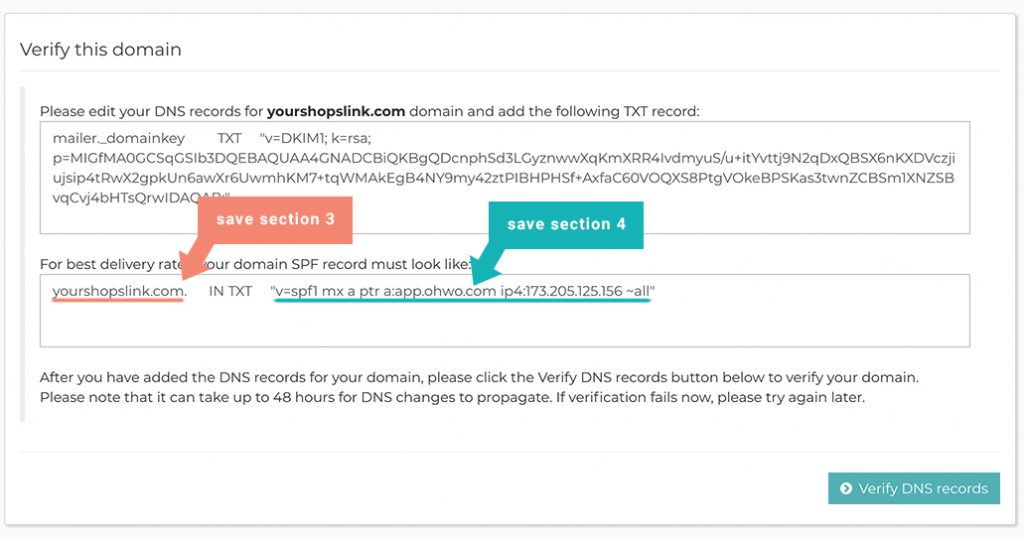
Save To The Same Text Doc But Separated From The First Two Sections
STEP 2. PASTE THE INFORMATION INTO YOUR DOMAIN HOSTS DNS RECORDS
Find Your DNS Zone Settings In Your Domain Account

- GoDaddy
- Siteground
- Hostgator
- BlueHost
- Dreamhost
- A2Hosting
- Ipage
- InMotionHosting
- SoftLayer
- Homestead
- Site5
- Linode
- FatCow
- LiquidWeb
- Hostinger
- MochaHost
- WebHostingHub
- GreenGeeks
- Wix
- Nexcess
- Shopify
- Hostwinds
- AccuWeb
- Rackspace
- FastComet
- HostPapa
- NameCheap
- InterServer
- Ehost
- iPower
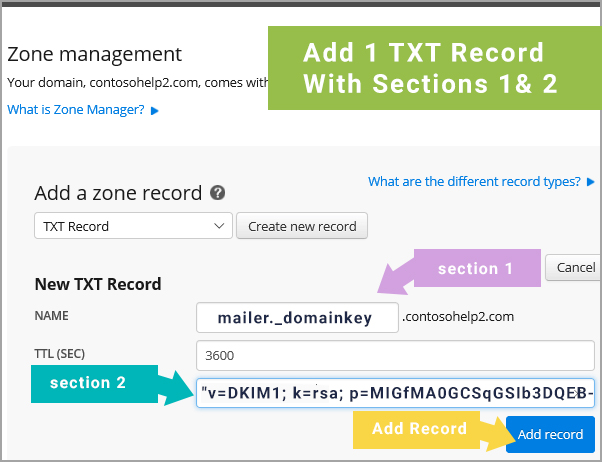
Enter Section 1 & 2 As 1 TXT Zone In Your DNS Settings
Add Section 1 to the Name Section.
Add Section 2 to the TXT Section.
Click Add Record.
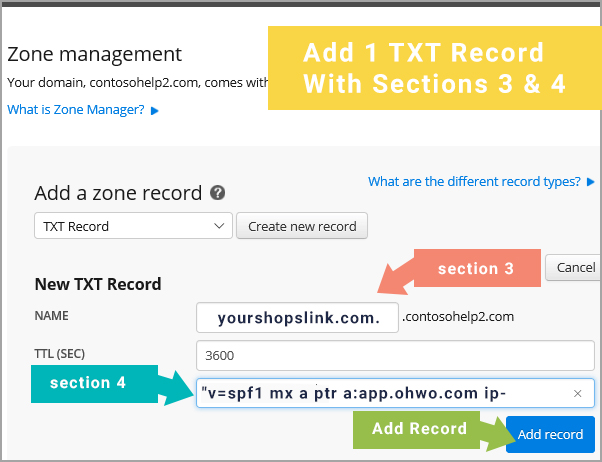
Enter Section 3 & 4 As A TXT Zone In Your DNS Settings
Add Section 3 to the Name Section.
Add Section 4 to the TXT Section.
Click Add Record.
STEP 3. CLICK ‘VERIFY DNS RECORDS’ INSIDE YOUR OHWO DASHBOARD
Go Back To OHWO And Click Verify DNS Records

Success! You should see your domain name verified.
You are now ready to create your first Address Book List. See related articles below.
