Log into your wp-admin dashboard
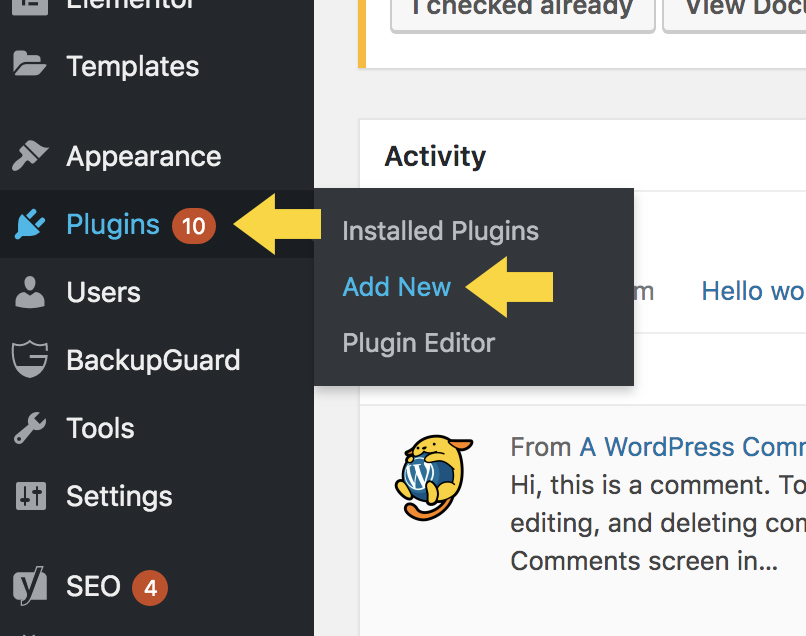
Click ‘Plugins’ -> ‘Add New’ from left side menu
Download Elementor OHWO Plugin
Click here or on the icon to download the Elementor OHWO Plugin
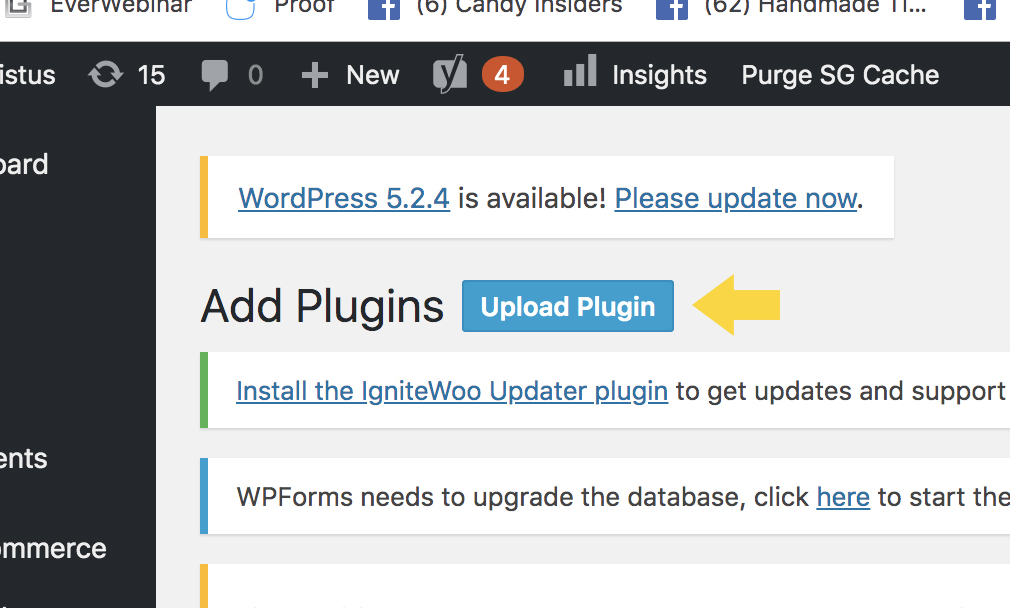
Upload the Plugin to Your WordPress Admin Dashboard
Click Upload Plugin
Click Choose File
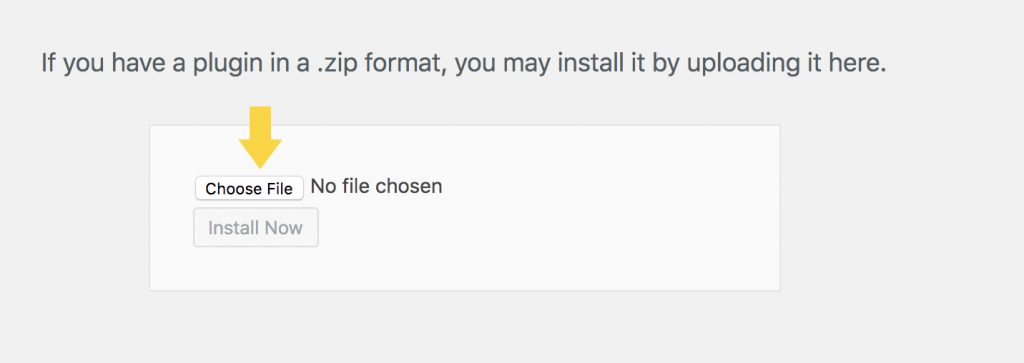
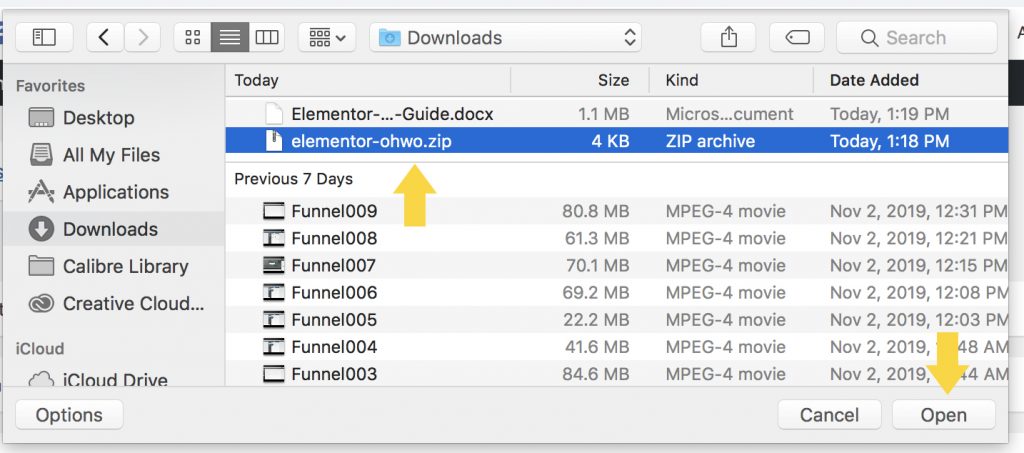
Navigate to elementor-ohwo.zip, select, click Open
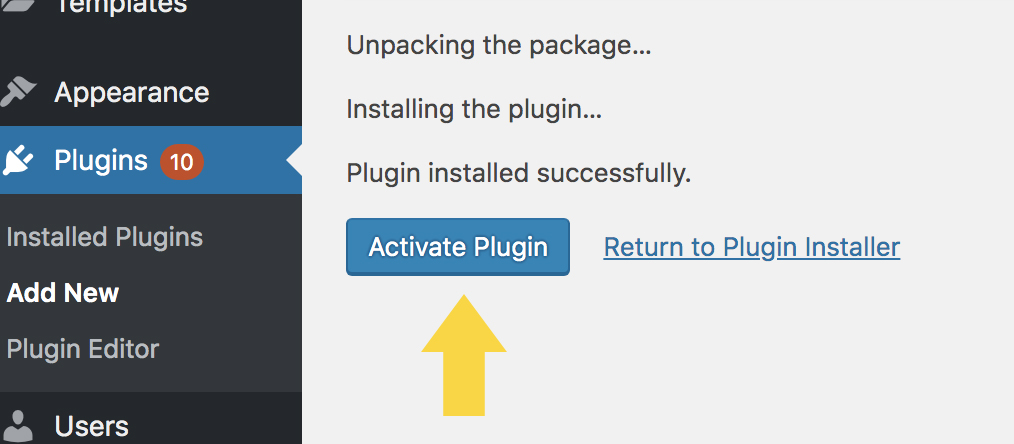
Click Install Now

Click Activate Plugin
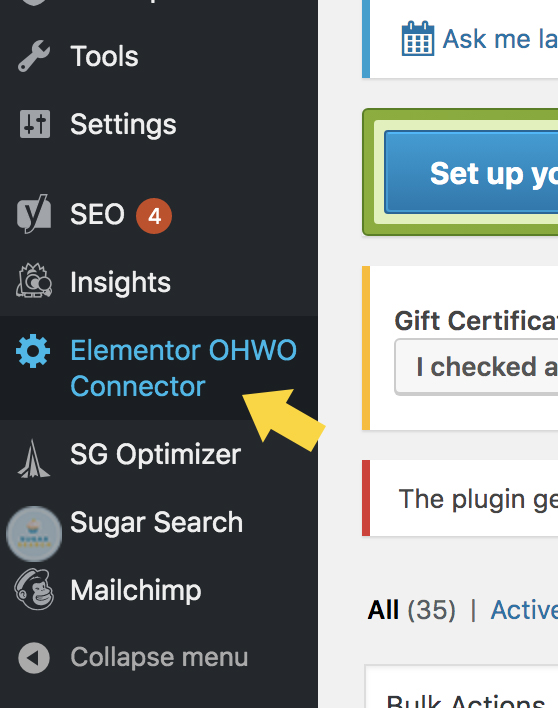
Find Your Elementor OHWO Settings
Look in your left side menu for “Elementor OHWO Connector” Option.
Click.
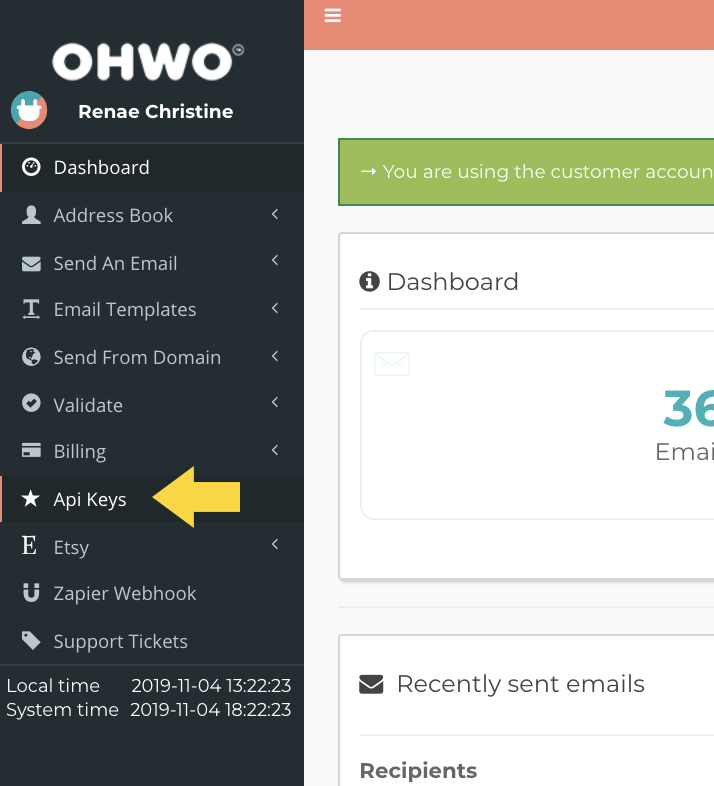
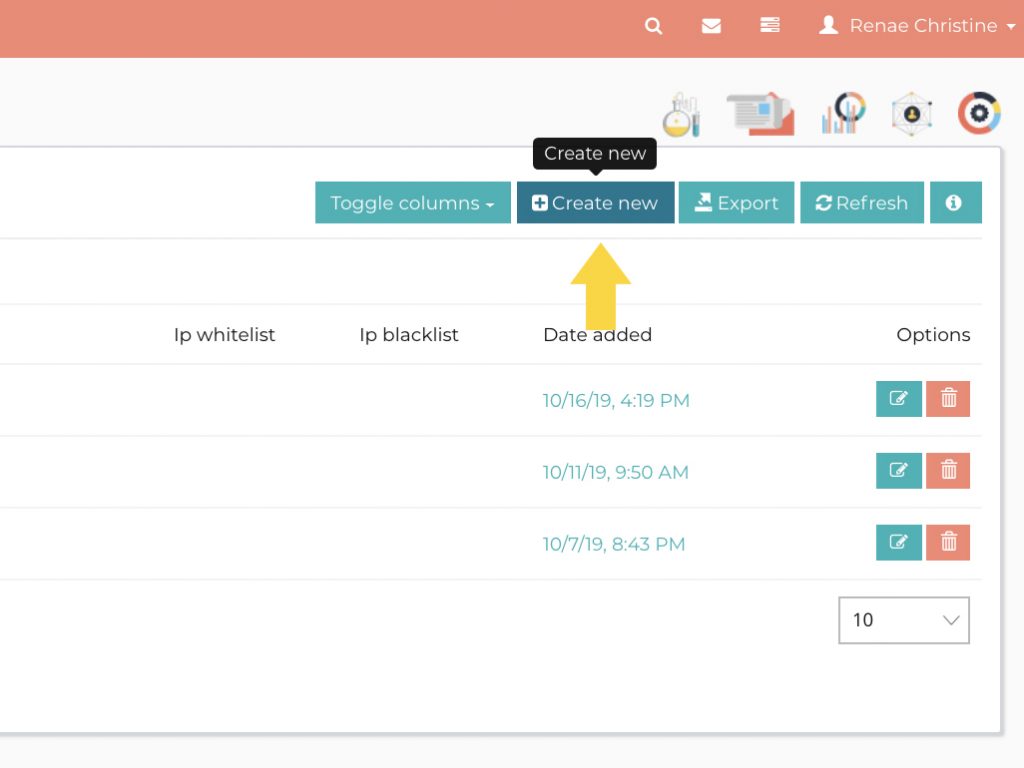
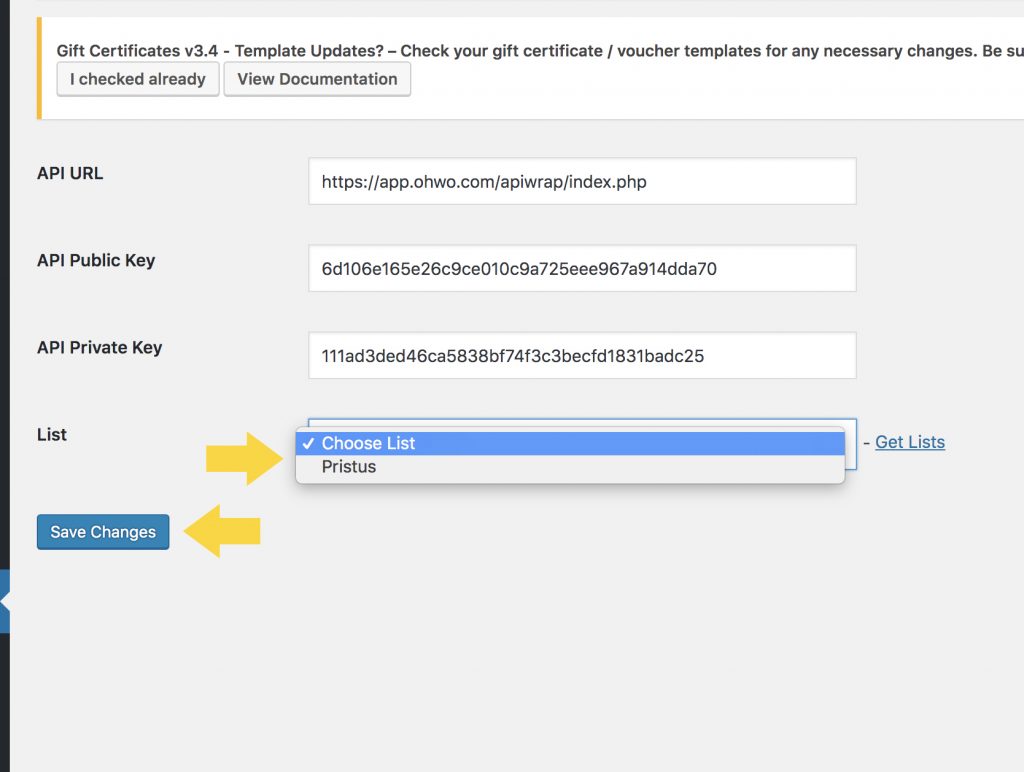
Find Your OHWO api Keys
Inside your OHWO account, find and click Api Keys in left side menu.
Create new OHWO Api Keys
Click Create new in sub top right menu
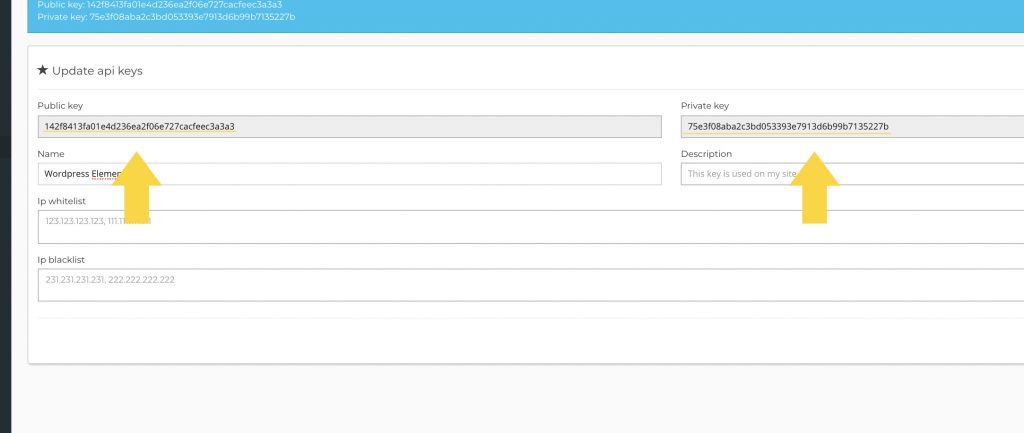
Copy Public key and Private key
Toggle back to Elementor OHWO Plugin WordPress browser
Paste Your Public key and Private key
Also copy and paste the following API URL:
https://app.ohwo.com/apiwrap/index.php
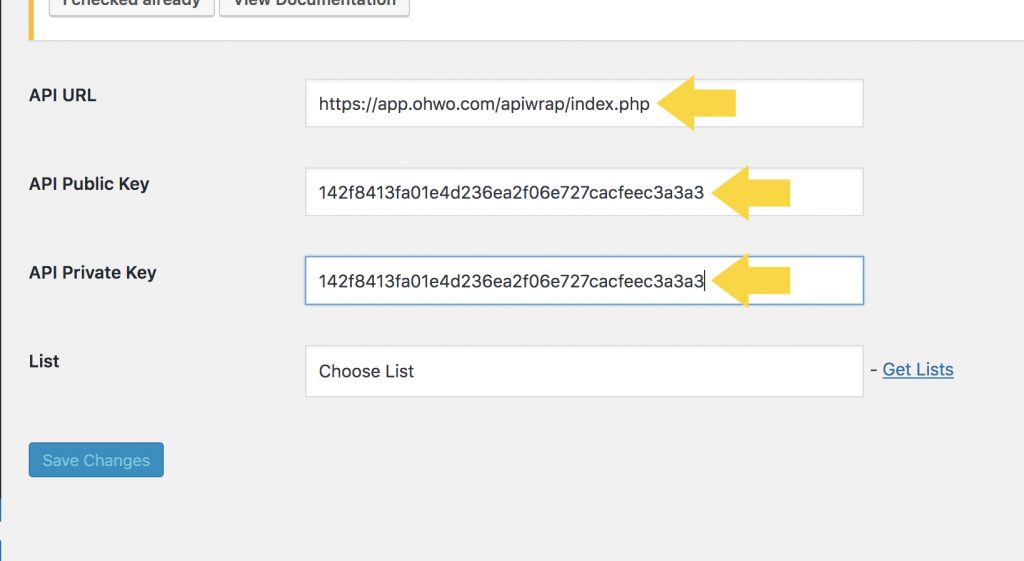
Next, Press ‘Enter’ or click Save Changes.
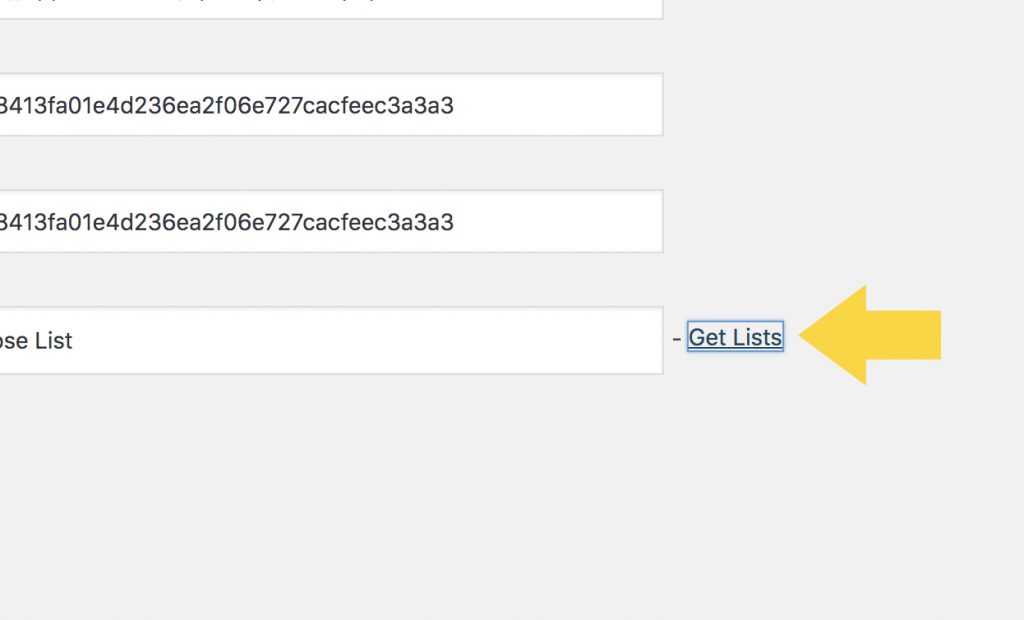
Choose Your OHWO Email List
Click ‘Get Lists’
Select the OHWO List that you want all users to go to who fill out Elementor forms on your website.
Click Save.
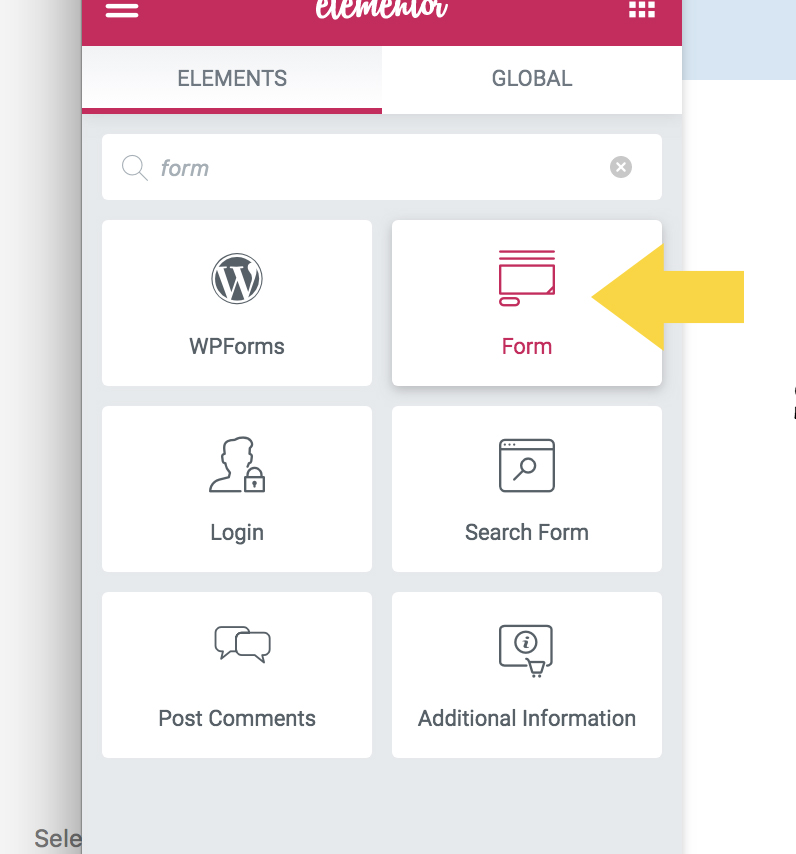
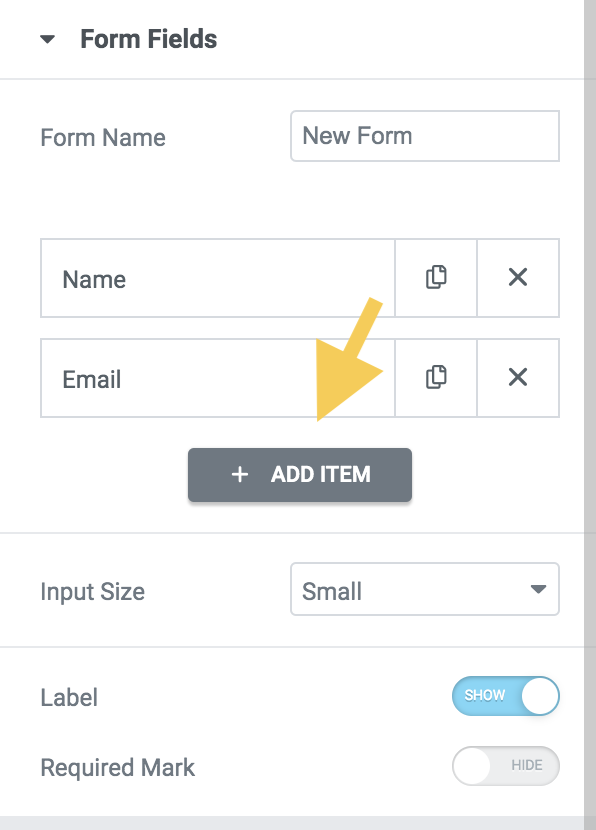
Add Your Elementor Form to a Page
Edit any page with Elementor.
Drag the Form Widget onto your page.
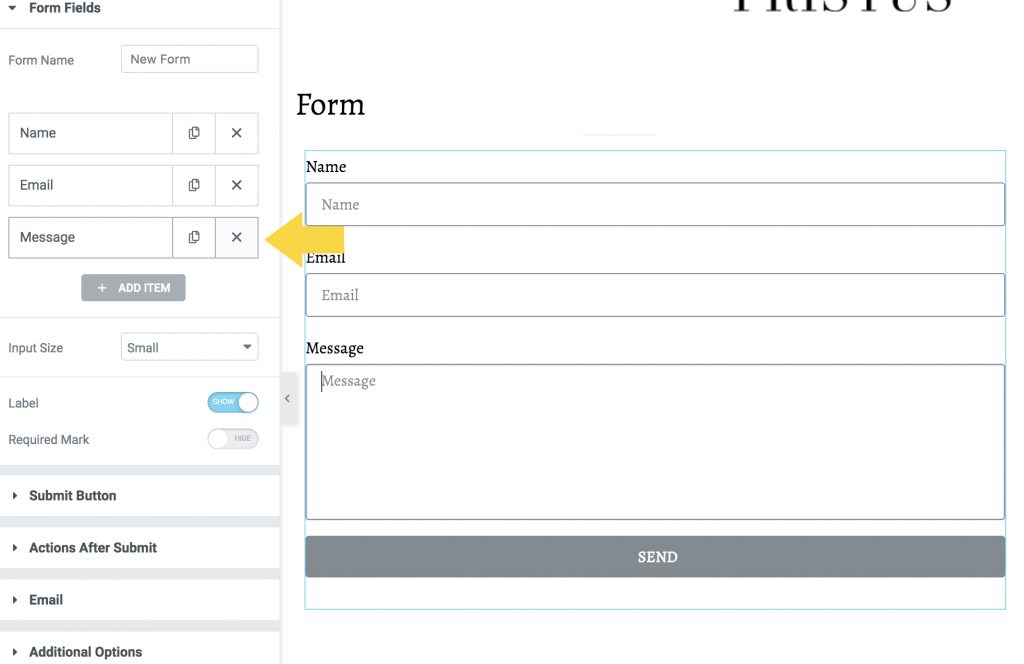
Click the X next to the message field.
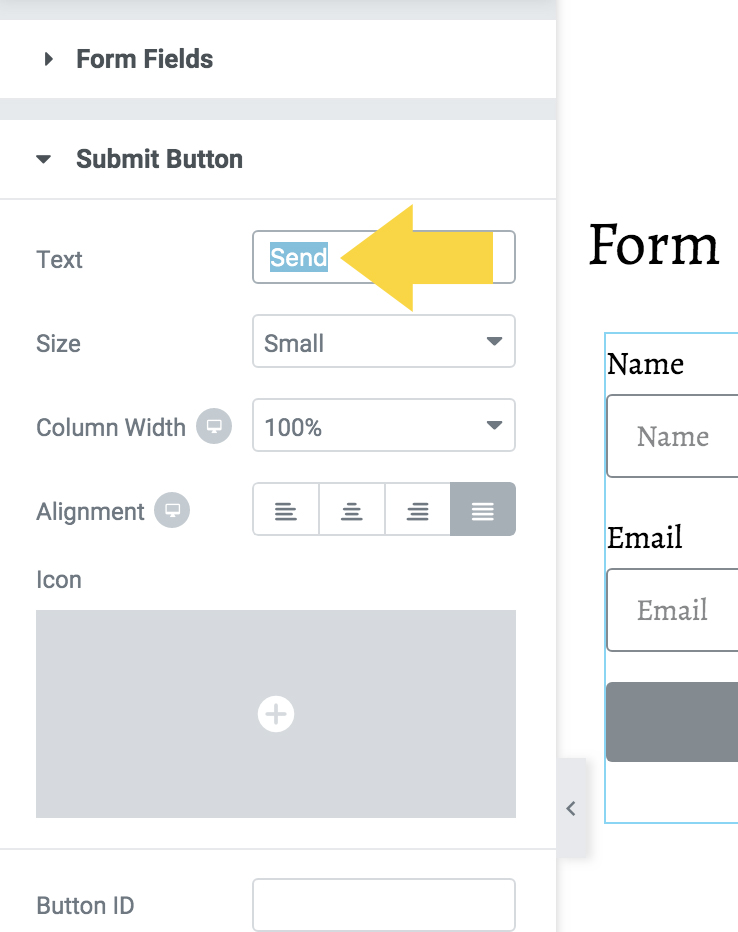
Click open ‘Submit Button’
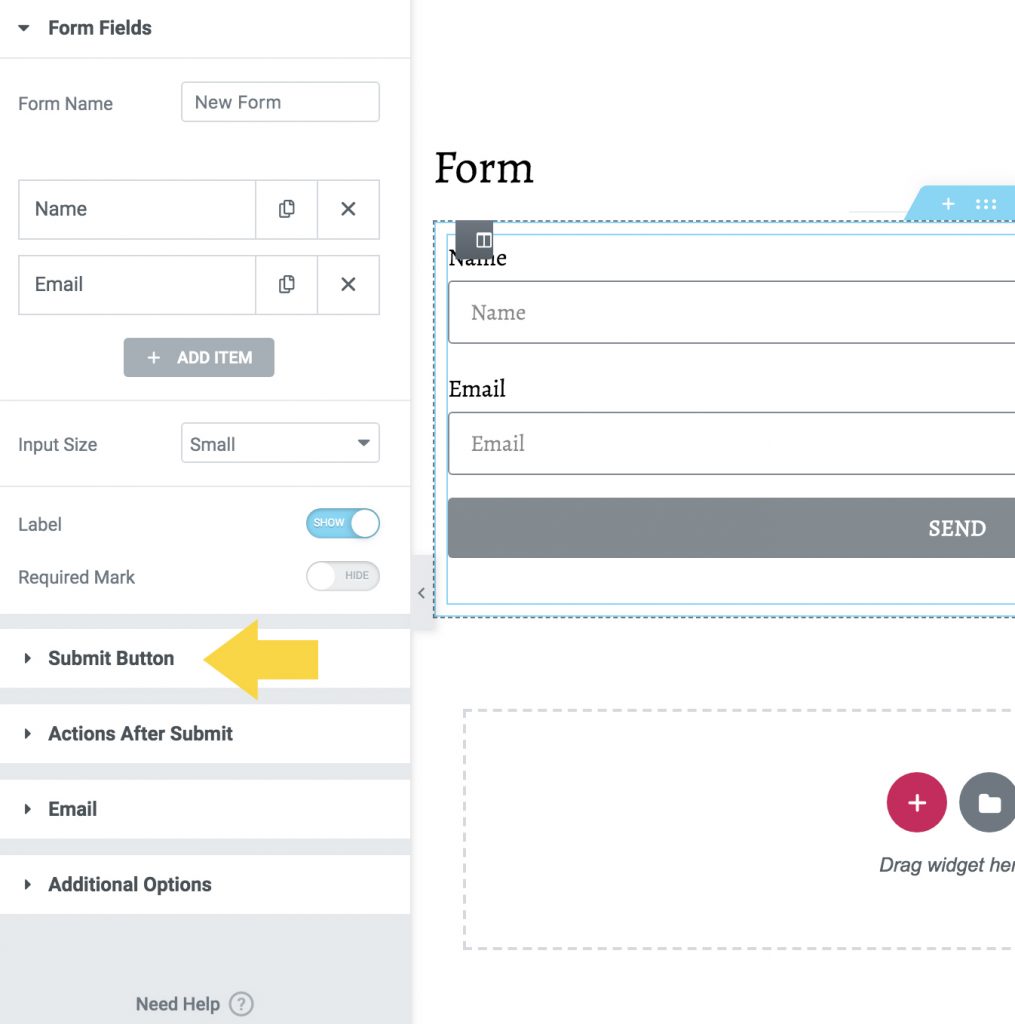
Change “Send” to “Submit”
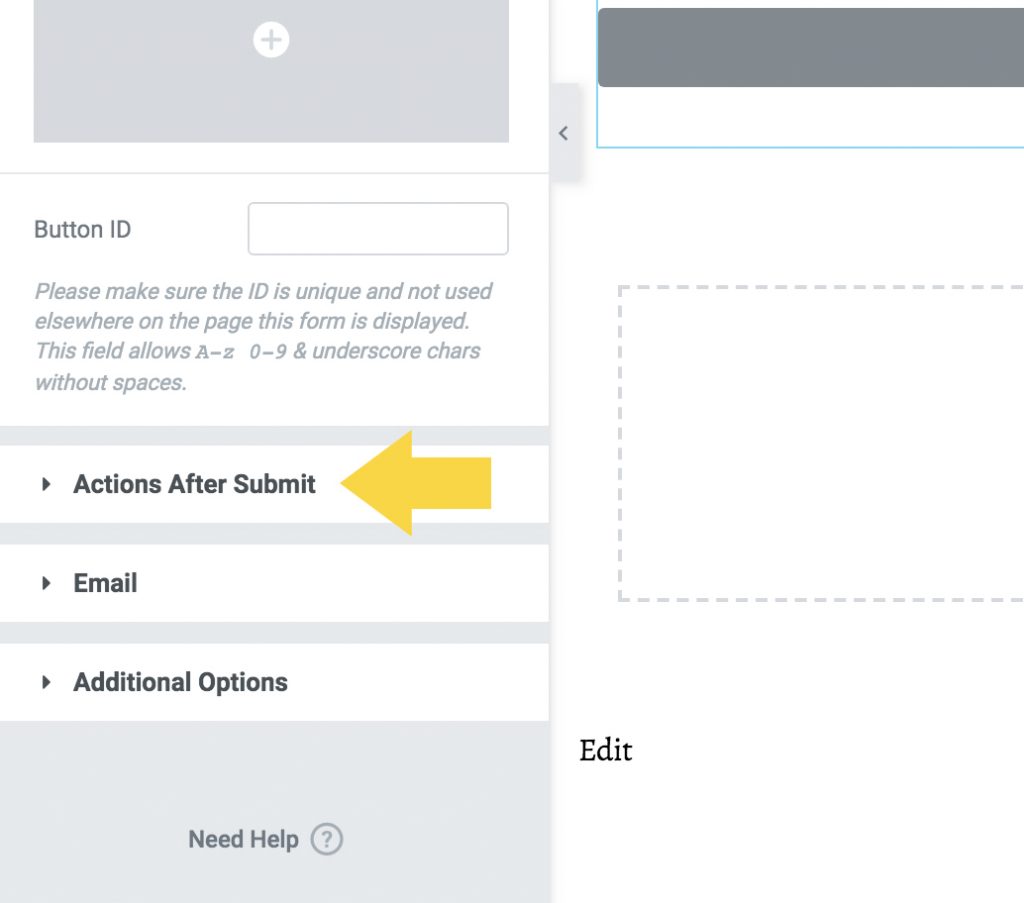
Choose What Happens When Your Form Submits
Toggle Open ‘Actions After Submit’ in left side menu
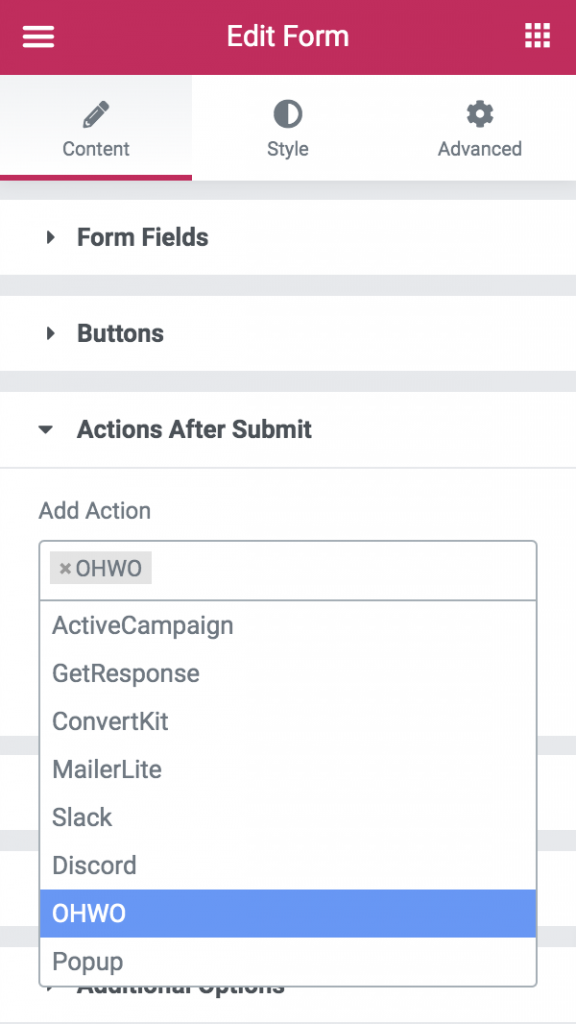
Select ‘OHWO’ from the ‘Add Action’ drop down menu.
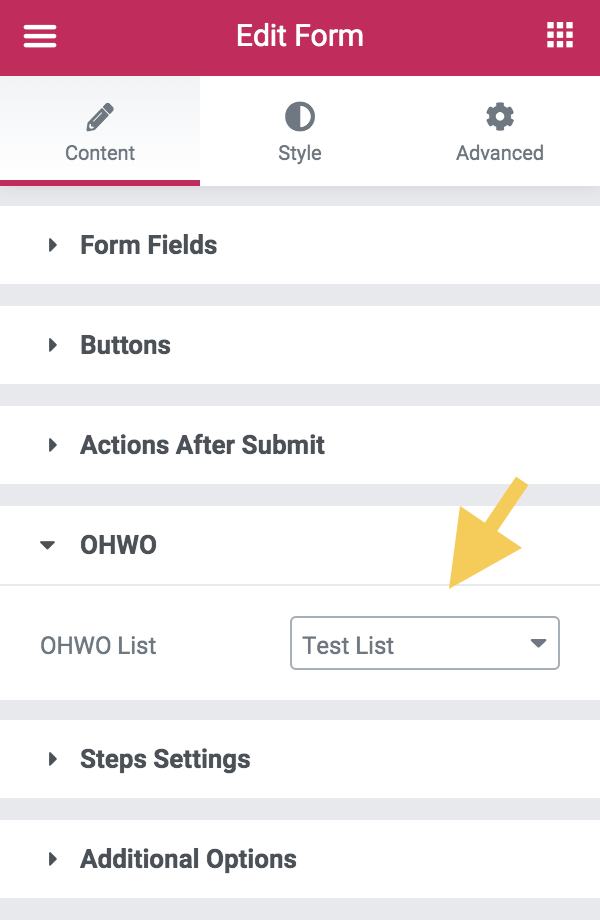
Select ‘OHWO’ in the left hand menu and then select the list you’d like your subscribers to be added to.
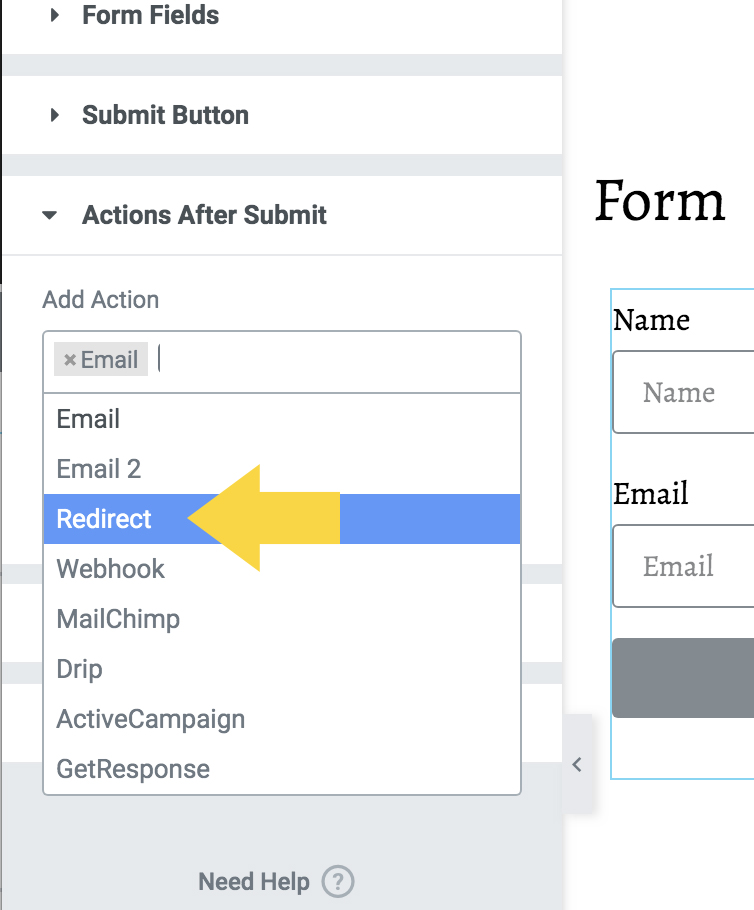
Option 1: Redirect to another page
Click in ‘Add Action’ field.
Choose ‘Redirect’ from drop down menu.
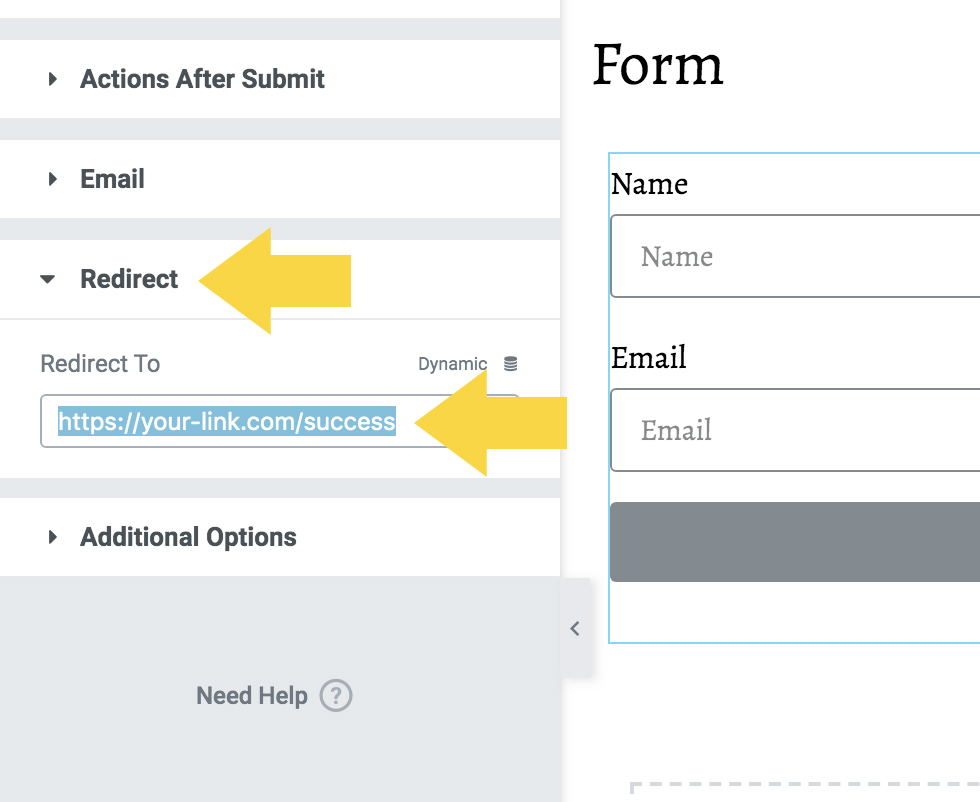
Toggle Open ‘Redirect’ in left side menu.
Add your success page url.
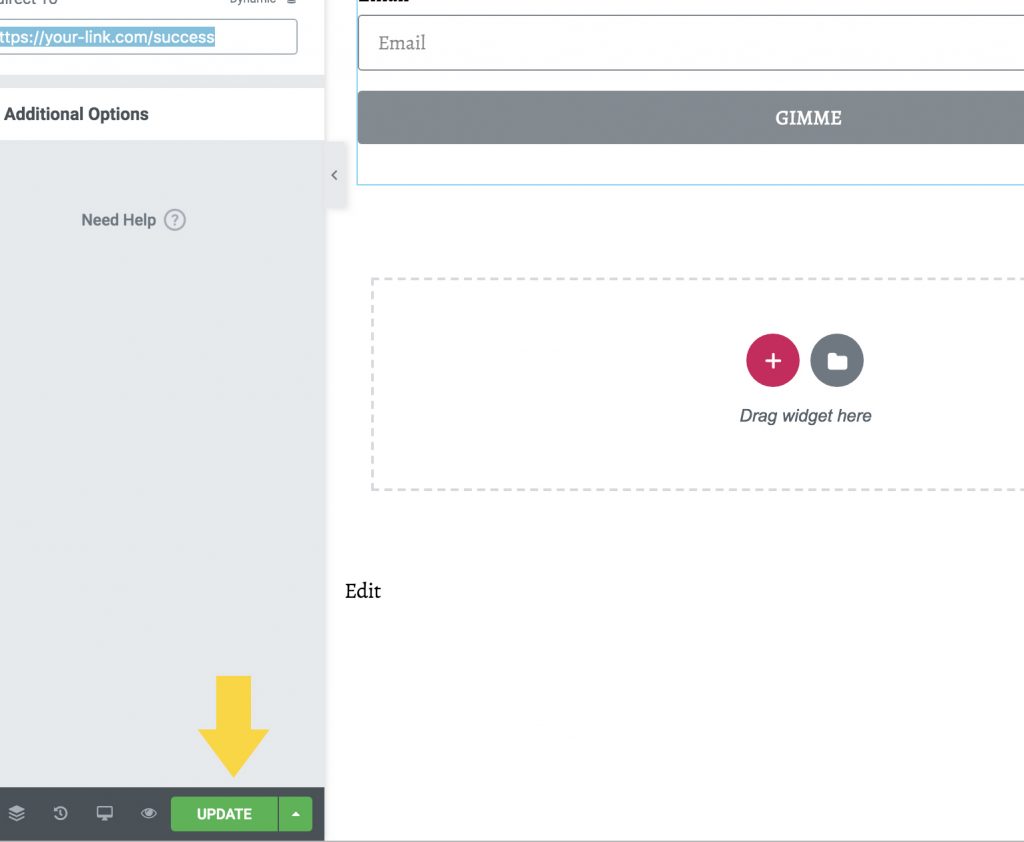
Click Update
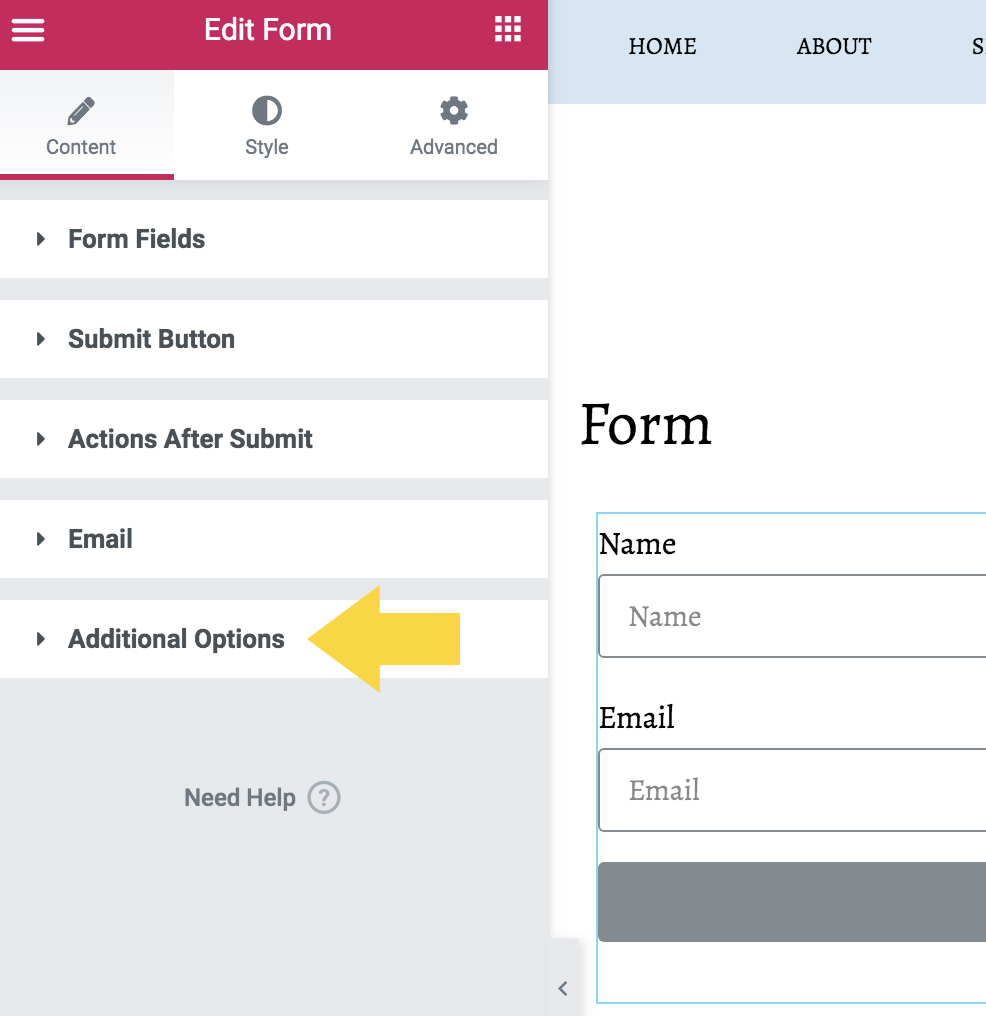
Option 2: Create Success Message
Click open ‘Additional Options’ toggle in left side menu
Click Custom Messages toggle to ‘YES’
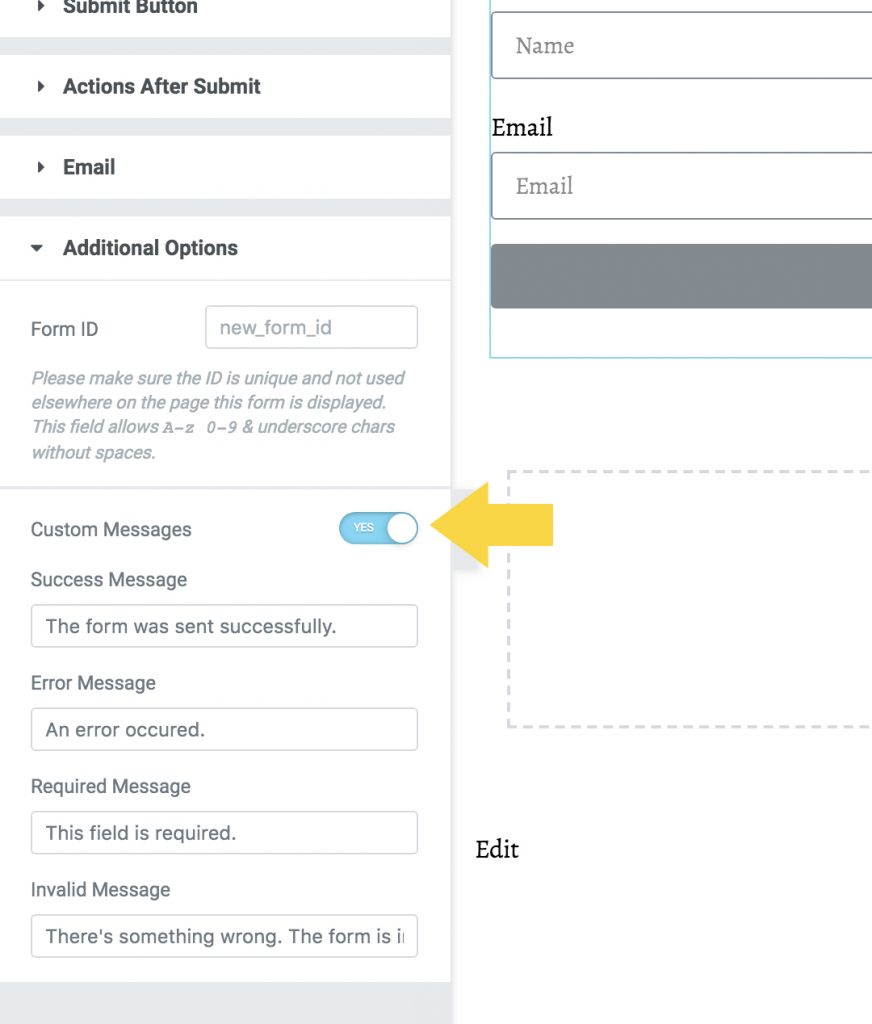
Change Custom Message
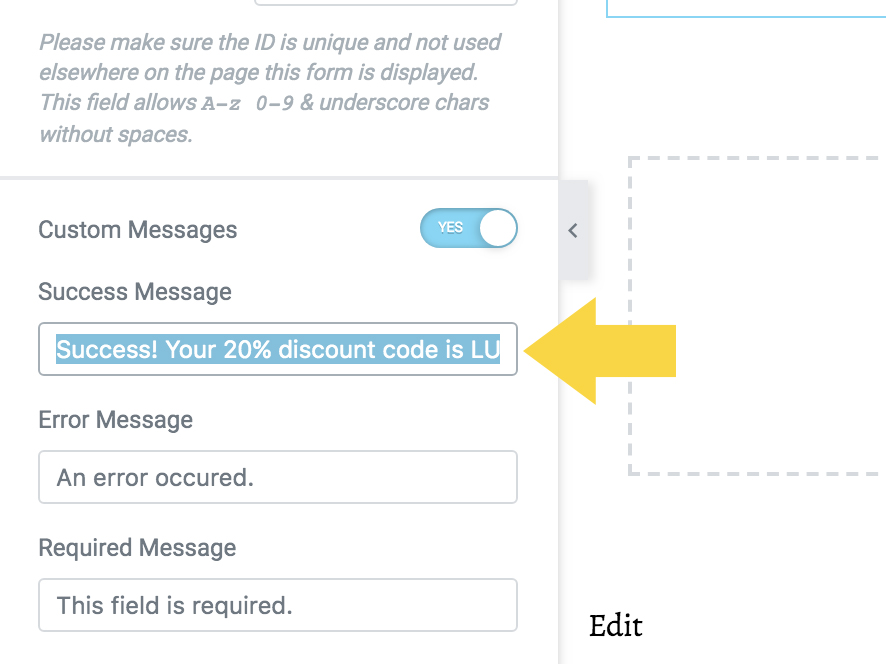
Click Update
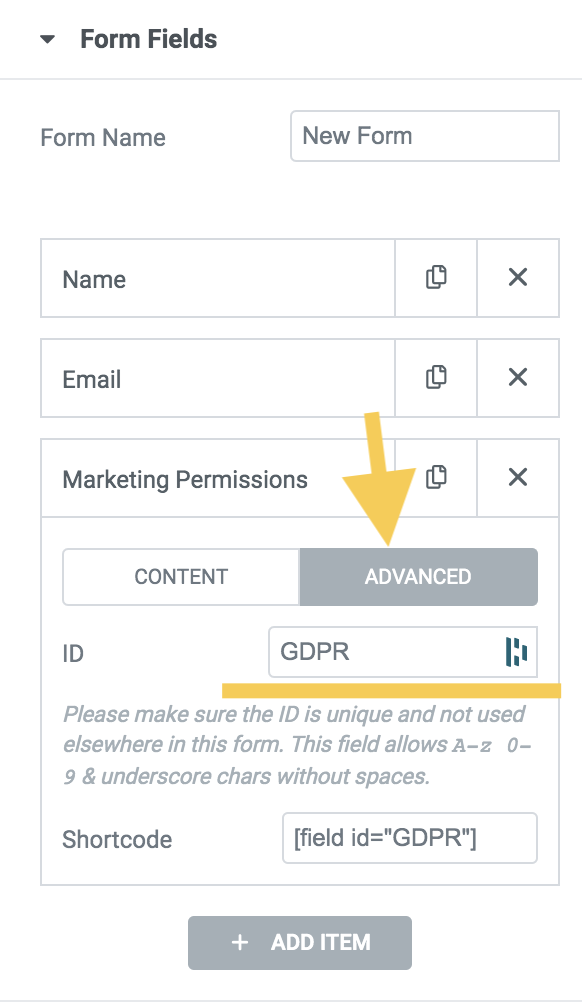
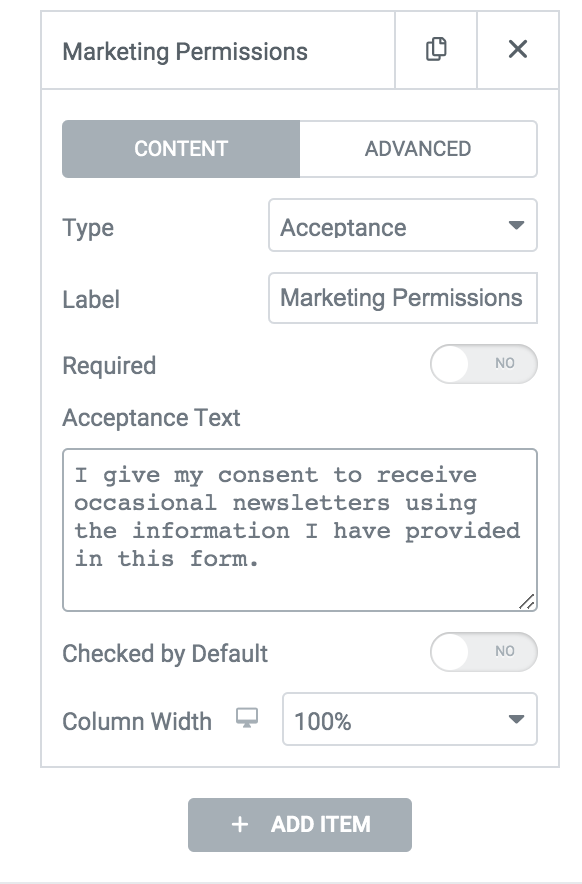
Make Your Form GDPR Compliant
Click “Add Item”
Select “Acceptance”
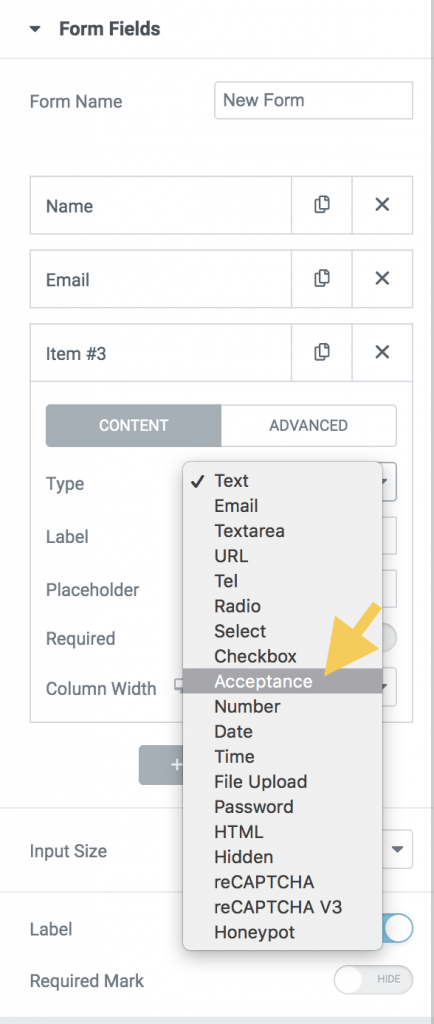
Fill in your Label and Acceptance Text.
Click the “Advanced” Tab and change the “ID” field to the tag that you used in your GDPR field in your OHWO list.